First, we started by making some salt dough. For this project I chose a salt/cornstarch dough because it tends to dry quicker, here's my favorite recipe for that...
- Mix 2 cups salt with 2/3 cup of water and heat over medium heat for several minutes. In another bowl mix 1 cup cornstarch and 1/2 cups of cold water. Remove the salt water from the heat and add in the cornstarch water. Return to the heat and stir continuously until thickened. Let cool a bit and then knead the dough until it's smooth and workable. This makes about 2 cups of dough.
So after making two batches of dough, we had enough to cover our glass bottle. Here's what it looked like (she's already started to paint it in this picture as I forgot to get the camera out on the first day, but you get the idea)...

Next we let our volcano dry for several days. This is where the size of you volcano makes a difference. The bigger the volcano = the more dough = very long time to dry. I had a friend who made a huge volcano (about 2 1/2 feet tall); very cool, but it took three weeks to dry! So after your volcano is dry, you can paint it. We opted for standard black paint, but you can use any color you like. Here's what it looked like after that...

After the paint dried(this took about 1/2 a day), we filled our bottle with 1/4 cup of baking soda, 2 Tbsp of liquid soap and some red food coloring. A funnel comes in real handy for this step, but if you don't have one or if your's has a wire mesh that won't allow baking soda through, like mine, you can always cut off the corner of a plastic bag.

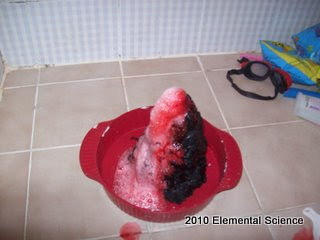
At this point I would move your volcano to a place that can get messy, such as outside, the sink or the shower. Now for the fun part, add 1/2 cup of white vinegar. Do this very quickly, as the reaction begins immediately! Here's what our volcano looked like as it was exploding...

We had alot of fun with this project, from start to finish! I highly recommend doing this at least once during your homeschooling journey.
ETA: I received an email from a dear friend of mine that let me know of another option for exploding your volcano. Apparently diet soda (preferrably orange as it makes cool colored lava) and a Tbsp of sugar creates alot more fun. We're going to try this later on in the week and I'll try to post a picture of it when we do. (We tried this and it didn't work for us, but I think that it's because we had alittle baking soda at the bottom of our volcano.)


1 comment:
My daughter has been waiting and waiting to do an exploding lava volcano :D We just might have to try this soon!
Post a Comment